![]()
A while ago I bought myself a HP Microserver - a cheap, low power box which has four 3.5″ drive bays and an optical drive bay. I bought it to run as a home server which would back up all my data as well as serve up video, music and photos around the house. I had decided before buying that I wanted to store my data using the ZFS filesystem since ZFS was the only filesystem at the time which offered guaranteed data integrity. (It still is the only filesystem of release quality which offers this, although BTRFS is catching up.) I have become almost obsessed with ZFS because of the overwhelming benefits it offers but I won’t go into them here. Instead I recommend watching this talk by the creators of ZFS (Part 1, part 2, part 3) or read through the accompanying slides. [PDF]
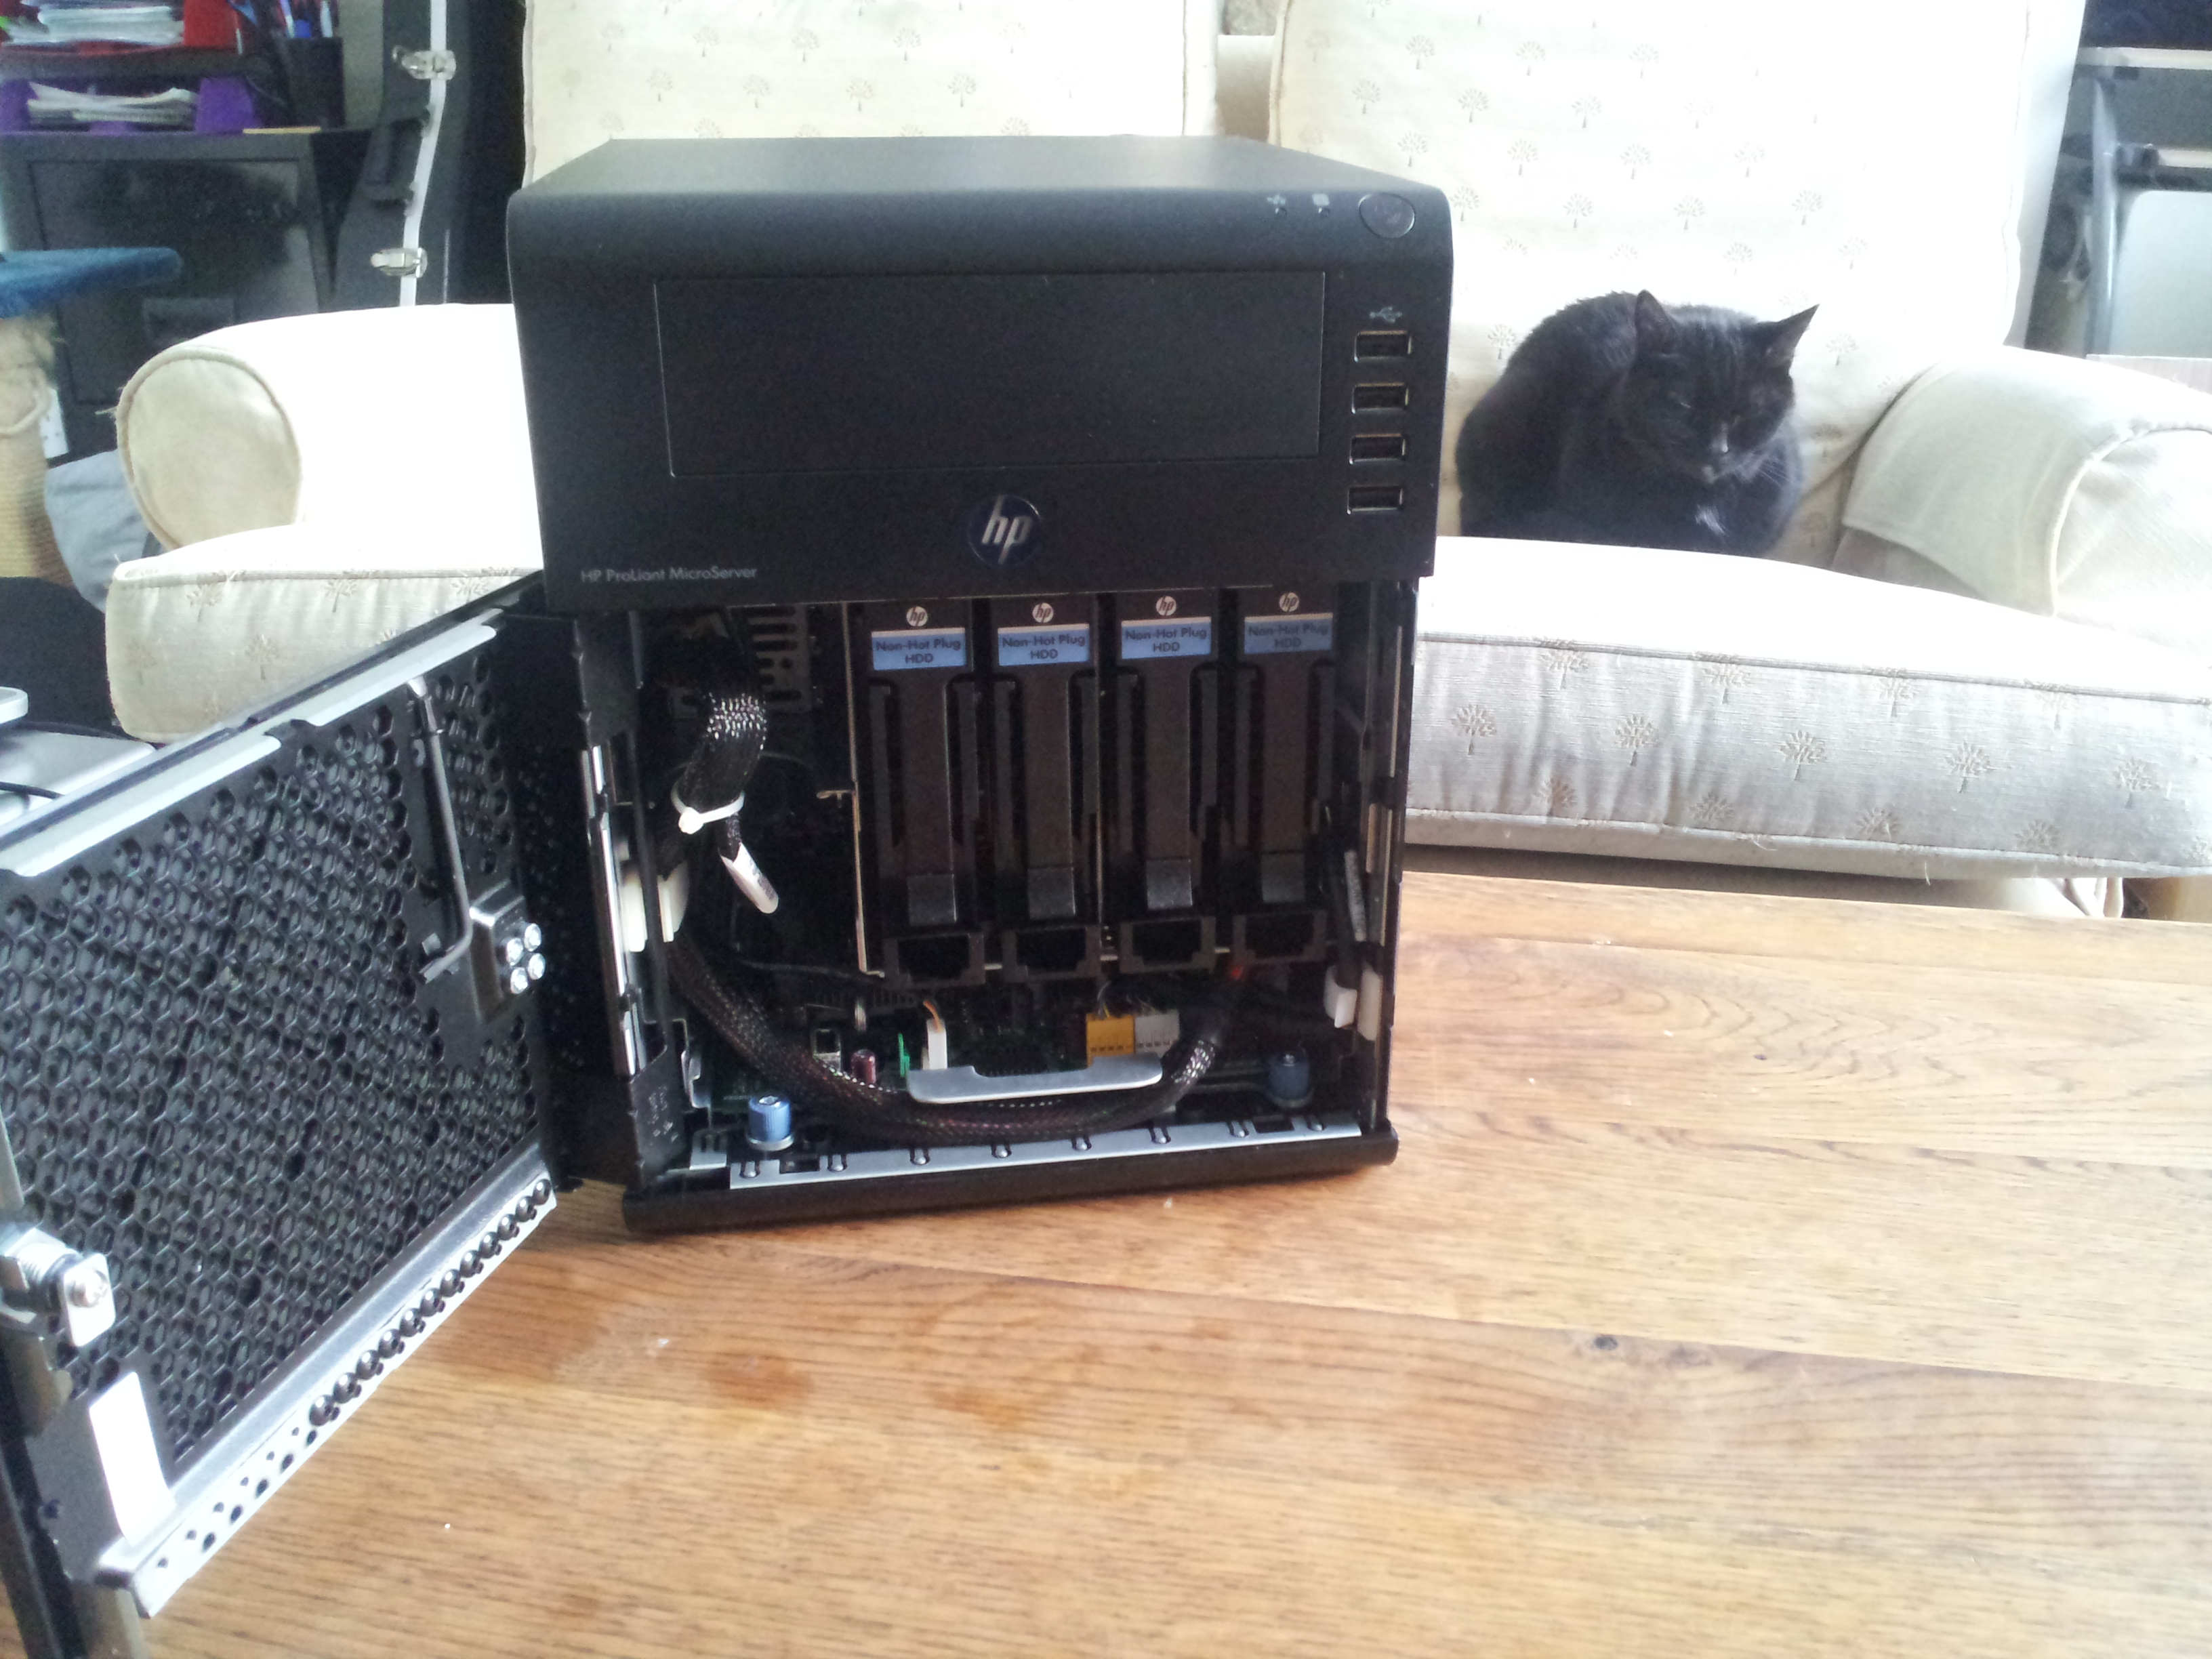
I meant at the time to write about how I set up my system but never did get around to it, so here is what I did in the end. The server arrived with 2GB of ECC RAM and a 250GB hard disk. I eventually upgraded this to 8GB RAM and added two 2TB hard disks, although I started with one 2TB disk and added the second as a mirror when finances allowed. ZFS checks the integrity of the stored data through checksums and so it can always tell you when there is data corruption but it can only silently heal the problem if it has either a mirror or a RAID-Z/Z2 (Equivalent to RAID 5 or 6.)
ZFS is available as part of FreeNAS, FreeBSD, Solaris, and a number of Solaris derivatives. I initially installed FreeNAS 8. FreeNAS runs from a USB stick which I put in the handy internal USB socket, but while that was great for storing and sharing files it was not so good for running bittorrent on or using SSH to connect from out of the house. I also tried Solaris but I ended up going back to what I know and using Ubuntu Linux 12.04 LTS. Although licensing prevents ZFS from being included with Linux it is trivial to add it yourself.
I have assumed a certain level of knowledge on the reader’s part. If it doesn’t make much sense to you then you might be better off with FreeNAS or an off-the-shelf NAS box.
After installing Ubuntu and fully updating it I did the following:
sudo add-apt-repository ppa:zfs-native/stable
sudo apt-get update
sudo apt-get install ubuntu-zfs
…and that was it. It is a lot more complicated to use ZFS as your root filesystem on Linux, so I don’t.
Next, I had to set up the ZFS storage pool. The creators of ZFS on Linux recommend that you use disk names starting with /dev/disk/by-id/ rather than /dev/sda, /dev/sdb etc as it is more reliable so look in that folder to see what disk names you have.
ls -l /dev/disk/by-id/
The example name given is tank but I strongly recommend that you use something else. To create a single disk storage pool with no mirror:
sudo zpool create tank /dev/disk/by-id/scsi-SATA_ST2000DM001-9YN_S2409P51
To add a mirror later you would do:
sudo zpool attach tank /dev/disk/by-id/scsi-SATA_ST2000DM001-9YN_S2409P51 /dev/disk/by-id/scsi-SATA_ST2000DM001-9YN_Z1E0EPBC
Or if starting with two disks in a mirror, your initial command would be:
zpool create tank mirror /dev/disk/by-id/scsi-SATA_ST2000DM001-9YN_S2409P51 /dev/disk/by-id/scsi-SATA_ST2000DM001-9YN_Z1E0EPBC
The system will create your storage pool, create a filesystem of the same name and automatically mount it, in this case under /tank.
“sudo zpool list” will show you that a pool has been created as well as the raw space in the pool and the space available.
“sudo zpool status” will show you the disks that make up the pool.
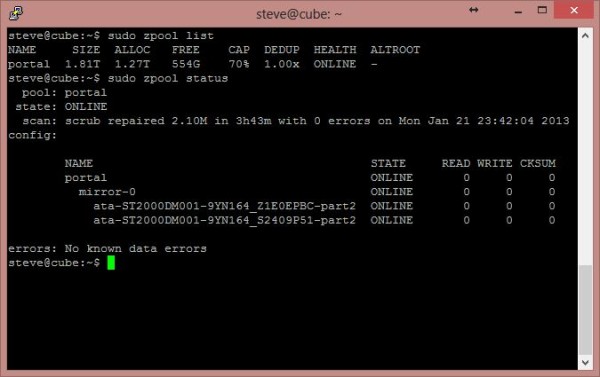
In my example above you can also see that ZFS has caught and repaired 2.1MB of corrupted data, without me even being aware of it.
While you can just start storing data in your newly-created filesystem (in /tank in our example) that isn’t the best way to use ZFS. Instead you should create additional filesystems within your storage pool to hold different types of data. You use the zfs command to do this. Some examples:
sudo zfs create tank/music
sudo zfs create tank/videos
sudo zfs create tank/backups
The above examples will create filesystems in the pool and will automatically mount them as subfolders of the main filesystem. Note that the name is in the format pool / filesystem name and there is no leading slash on the pool name.
Check that your filesystems have been created:
sudo zfs list
Now we need to share the data, otherwise it’s not much of a server. ZFS will automatically manage sharing through NFS (Unix/Linux) or SMB (Windows) but you must first install the server software.
sudo apt-get install nfs-kernel-server samba
You don’t need to configure much because ZFS handles most settings for you, but you might wish to change the workgroup name for Samba in /etc/samba/smb.conf.
To share a ZFS filesystem you change a property using the zfs command. For Windows clients:
sudo zfs set sharesmb=on tank/music
sudo zfs set sharesmb=on tank/videos
For Unix / Linux clients:
sudo zfs set sharenfs=on tank/backups
Or you can share the whole lot at once by sharing the main pool. The sub-filesystems will inherit the sharing property unless you turn them off:
sudo zfs set sharesmb=on tank
sudo zfs set sharesmb=off tank/music
You can check whether your filesystems are shared or not:
sudo zfs get sharesmb,sharenfs
At this point you should be able to see your shares from other computers on the network but you probably won’t have permission to access them. You will need to ensure that the file permissions and owners are set correctly, and you will also have to add an account and set a password for use when connecting through Samba. If your username is steve then use:
sudo smbpasswd -a steve
to set your Samba password, and make sure that steve has permission to access all the files in your shared folders. This command inside your shares should help: (Change the name, obviously.)
cd /tank/videos
sudo chown -R steve:steve *
I hope this will be helpful if you are trying to set up a ZFS server. Let me know in the comments.

 Subscribe in a reader
Pingback: ZFS and Ubuntu Home Server howto | Lost Packets()